Native code in the browser with Emscripten
The web browser can do a lot these days. From social media to video playback and even telecommunications suites, what can be accomplished with a browser and some JavaScript is truly incredible.
What if you already have a body of code written for another platform though? We may need that to run in the browser, and porting it to JavaScript may be impractical. Perhaps there are performance requirements, or the code in question is part of a shared library used for several different platforms.
Wouldn't it be neat if we could take our code, and with minimal changes, run it in the browser? With WebAssembly you can do just that! To get started compiling code for WebAssembly, we'll be using Emscripten. Emscripten abstracts away the differences from a web browser and our native platform code so it can run (mostly) unmodified. It also provides some methods for our frontend JavaScript code to call into our native code, and vice-versa. Take a peek at the documentation, especially for emscripten.h for more details.
Porting SDL-based code to Raylib
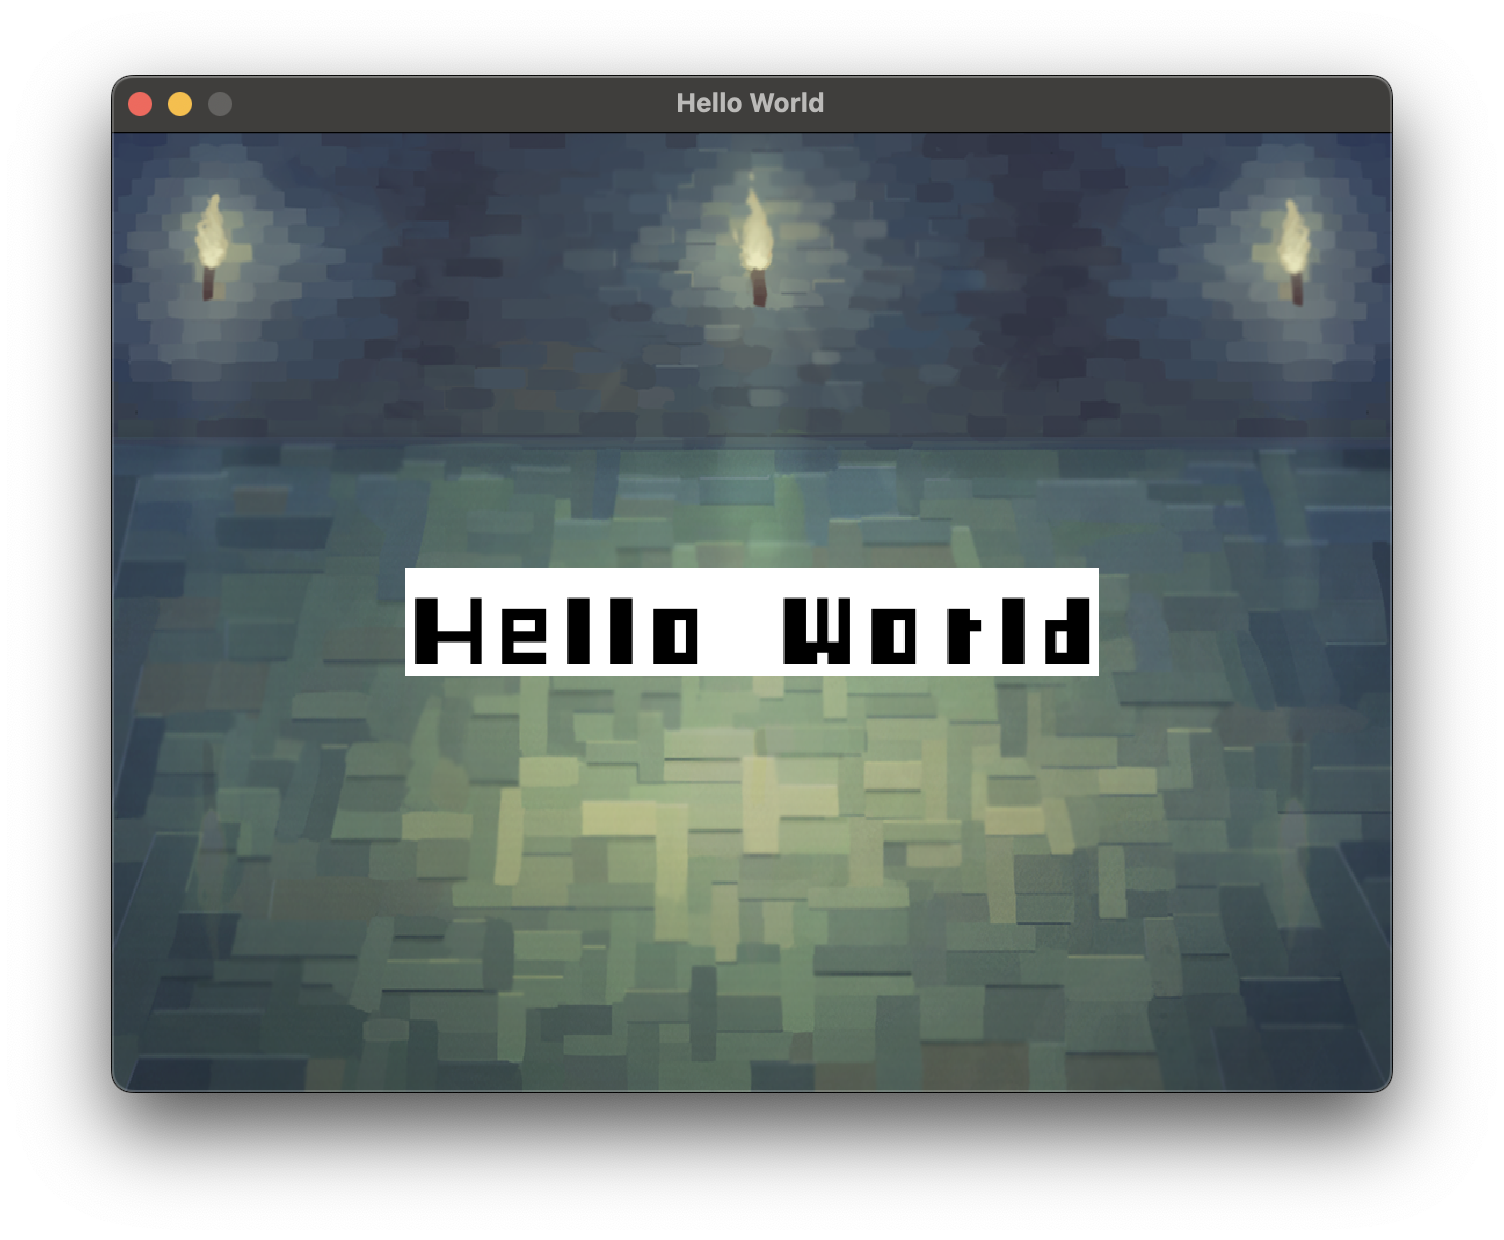
For today's post, I've taken the Miyoo demo I wrote last year and updated it to use the Raylib library instead of SDL.
SDL does work in the browser via WebAssembly, but there are some bugs in its helper libraries SDL_mixer and SDL_ttf.
Fortunately, Raylib is a self-contained multimedia library with WebAssembly as a supported platform target by the project. It also has a delightfully simple API. Porting our SDL-code to Raylib was easy. I won't go into all the differences between the two libraries here, but feel free to check out the C++ source code on GitHub!
Since I'm writing this on a mac, I've tweaked the Makefile for linking against Raylib from the Homebrew package manager. Running TARGET=desktop make produces our binary, and it works:
Building for the browser
With our code working locally, how do we assemble this same code for the browser? Let's start with compiling the code.
First, we need the Emscripten sdk installed. On a mac, you can achieve this with brew install emscripten.
Next, fetch a build of Raylib for WebAssembly. A curl can get us there:
curl -sL \
https://github.com/raysan5/raylib/releases/download/5.0/raylib-5.0_webassembly.zip \
| bsdtar -x -C .
This downloads raylib and extracts it to the current working directory. We can then specify this path for includes and linking.
To build the program, we use the emcc command with a few flags:
emcc \
main.cpp \
-I </path/to/raylib/include> \
-L </path/to/raylib/lib> \
-lraylib \
-lm \
-s USE_GLFW=3 \
-s GL_ENABLE_GET_PROC_ADDRESS \
-s WASM=1 \
-s MODULARIZE=1 \
-s EXPORT_ES6=1 \
--embed-file ./assets \
-o index.js \
-O3
Let's break down the flags:
-Iand-Lspecifies where to look for our header and library files-lspecifies which libraries to link-stells emcc to use certain packaged libraries and controls generation of the binaryUSE_GLFW=3raylib depends on GLFW, so we need to pull this inGL_ENABLE_GET_PROC_ADDRESSraylib usesglGetProcAddressto discover which OpenGL features are availableWASM=1emit WebAssemblyMODULARIZE=1generated JS is wrapped in a promise that can be awaited when we are ready to run itEXPORT_ES6=1generated JS uses an ES6 module export
--embed-filestuffs our static assets (pngs, fonts and sounds) into the wasm binary-ospecifies the name of the generated JavaScript-O3enables optimizations on the compiled code
Running this command produces two files: index.js and index.wasm.
The wasm file contains our static assets as well as our compiled code. The JavaScript file facilitates loading and running the wasm file.
Wiring up the browser
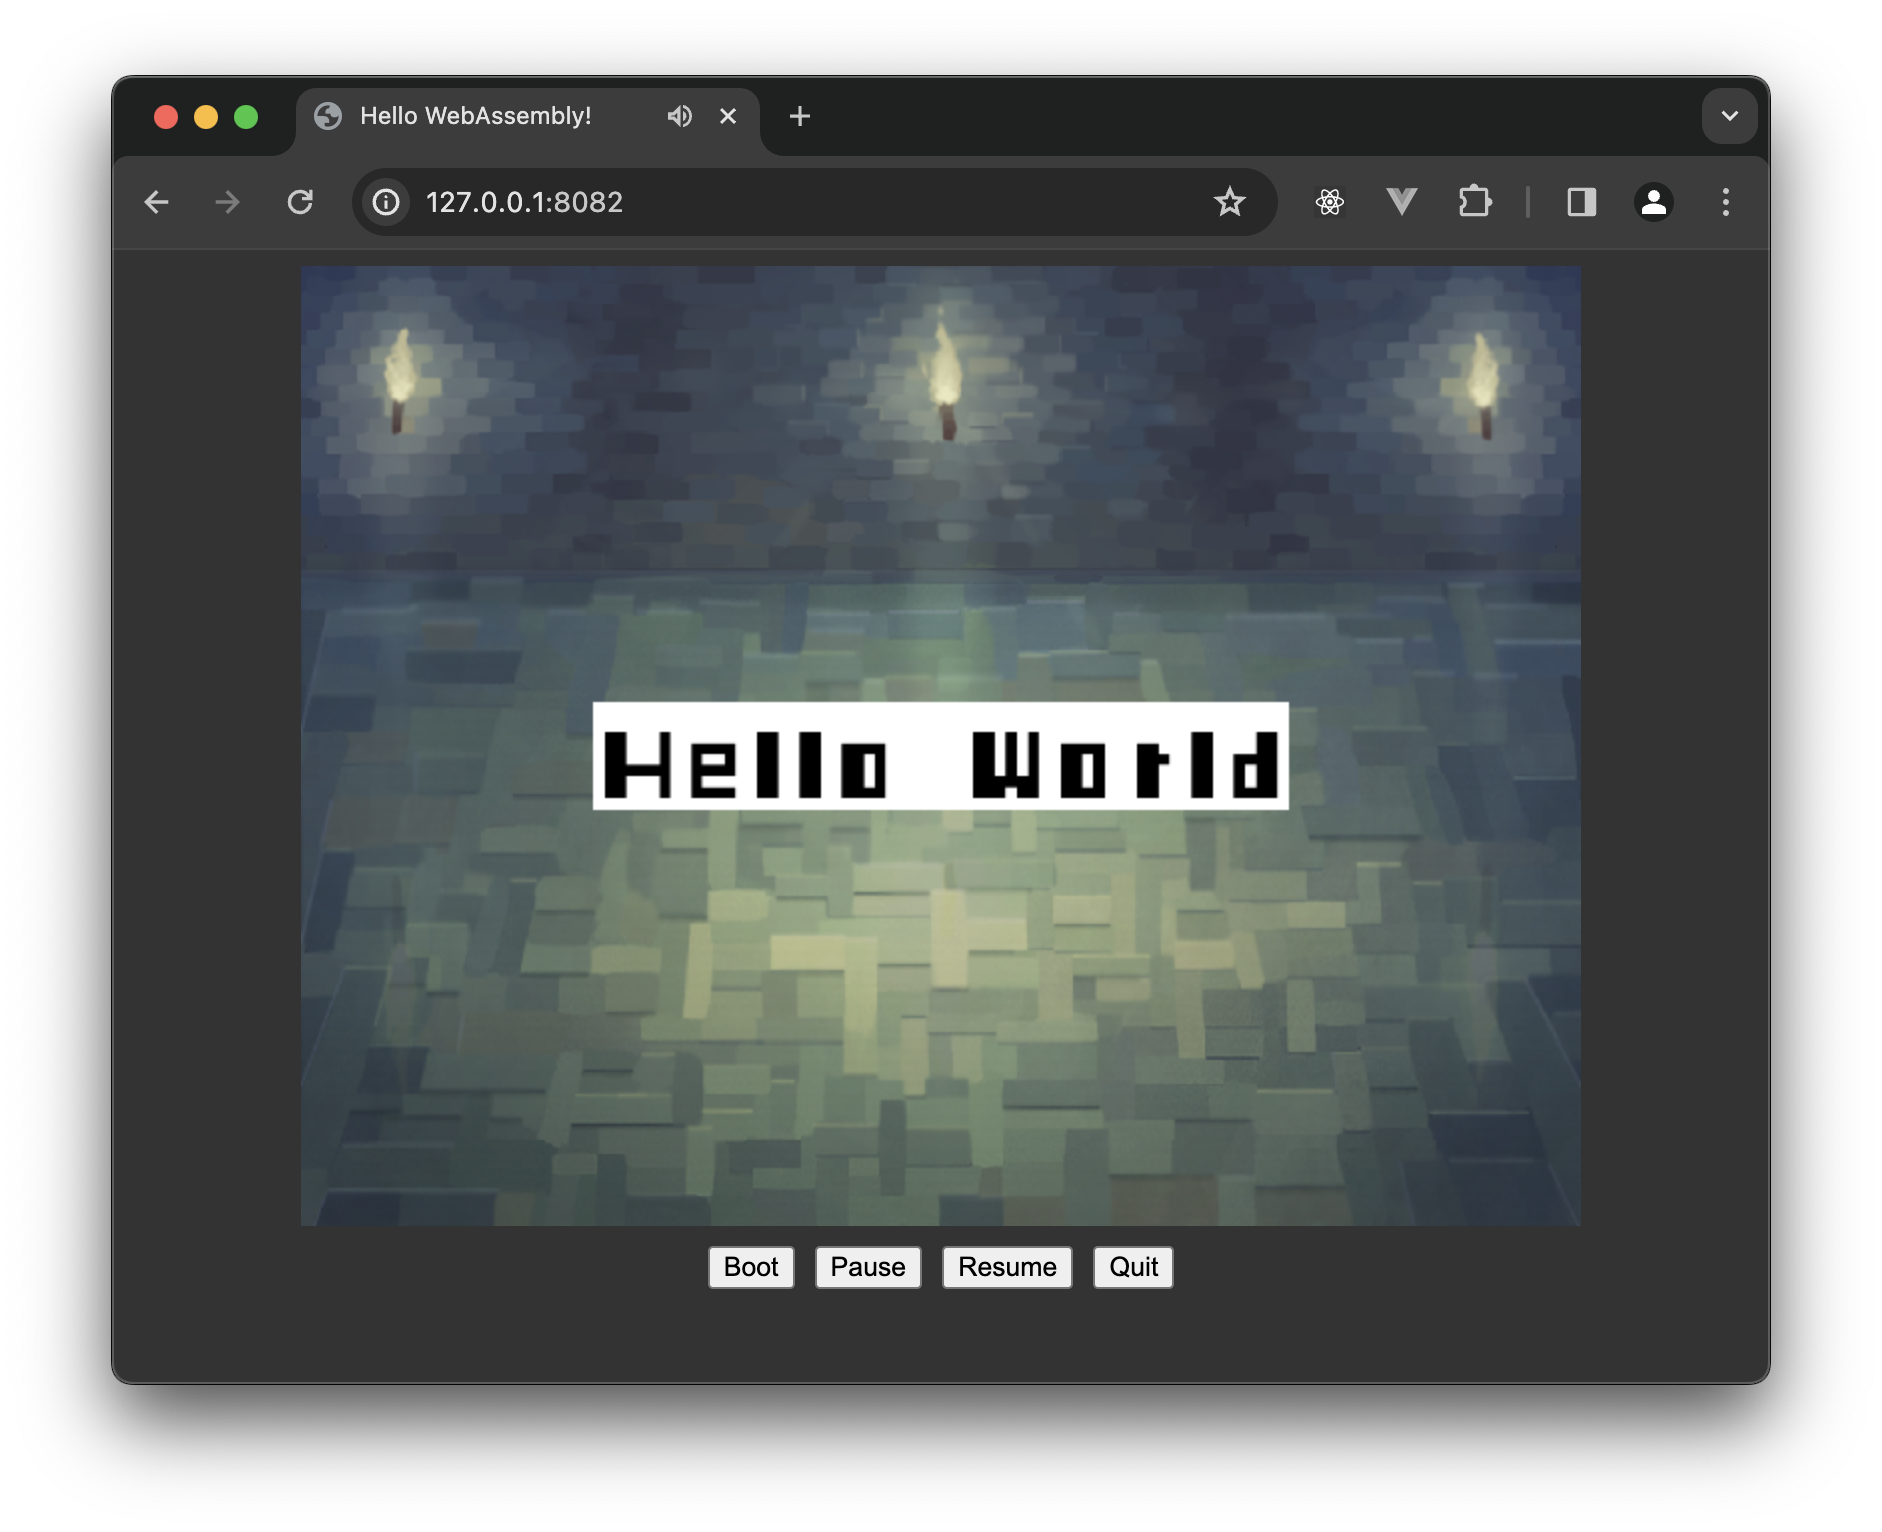
So how do we get this going in the browser? With the JavaScript in hand, we can move our attention to the HTML. Since this is a graphical application, we'll need a canvas element. We'll also need some buttons to give the user control over execution:
<canvas id="canvas"></canvas>
<button id="boot">Boot</button>
<button id="pause">Pause</button>
<button id="resume">Resume</button>
<button id="quit">Quit</button>
Next we'll add a little more JavaScript to handle launching the generated wasm as well as calling into our native code:
<script type="module">
    import Module from "./index.js";
    let runner = null;

    async function boot() {
        if (!runner) {
            runner = await Module({
                canvas: document.querySelector("#canvas"),
            });
        }
    }

    function pause() {
        if (runner) {
            runner["_pause"]();
        }
    }

    function resume() {
        if (runner) {
            runner["_unpause"]();
        }
    }

    function quit() {
        if (runner) {
            runner["_shutdown"]();
            runner = null;
        }
    }

    document.querySelector("#boot").addEventListener("click", boot);
    document.querySelector("#pause").addEventListener("click", pause);
    document.querySelector("#resume").addEventListener("click", resume);
    document.querySelector("#quit").addEventListener("click", quit);
</script>
Here we've imported the generated JavaScript bundle from emcc and defined four functions.
The boot function wires up the previously defined canvas element, and then starts execution of our application (i.e., main()).
The remaining three functions call into natively exported functions pause, unpause and shutdown.
Browser considerations
Most graphical applications have an event loop contained within an infinite loop. That's typically how games work, or it would be a very short-lived game! 😂 Unfortunately this pattern doesn't work very well within a browser context. If your calling code never yields back to the browser, how can it possibly do all of the other things a browser is supposed to do?
Emscripten provides a mechanism for this with its helper function emscripten_set_main_loop(). It's important to structure our looping code into a separate function that can then be invoked by this function.
Similarly, emscripten provides mechanisms for pausing, unpausing and terminating execution of our native code. That is why we expose the remaining three functions on the frontend. Here's what the native code looks like:
#ifdef __EMSCRIPTEN__
extern "C" {
    EMSCRIPTEN_KEEPALIVE void pause() { emscripten_pause_main_loop(); }
    EMSCRIPTEN_KEEPALIVE void unpause() { emscripten_resume_main_loop(); }

    EMSCRIPTEN_KEEPALIVE void shutdown() {
        emscripten_cancel_main_loop();
        deinit();
    }
}
#endif
EMSCRIPTEN_KEEPALIVE tells the compiler to avoid stripping "unreachable" code, as this is invoked by the browser and not natively. Then it's just a matter of calling the appropriate functions.
Putting it all together
With our compiled code we can boot up an http server with npx http-server and navigate to our html file.
Clicking the Boot button will launch into our demo, and the Pause/Resume buttons will temporarily halt or resume execution. We can then end the program with Quit. How cool is that?